-
2103 Room NO.322 Xinggang One Road, Haicang District, Xiamen Fujian, China


How to Install Solar Ground Screws: A Step-by-Step Guide for Beginners
Table of Contents
Do you want to build your own solar mounting system? Do you wish to save time and money? We are a solar mounting factory that makes solar mounting systems and many accessories. One of our best products is the Solar Ground Screw. This guide will show you how to install solar ground screws and why they are so good.
We know that many people have problems with old, slow methods. That is why we use solar ground screws to fix solar panels fast and well. In this article, we use the PAS (Problem, Agitate, Solution) method to help you learn why these screws work best and how you can install them.
1. The Problem: Old Ways Cause Big Hassles
Many people use old methods like concrete for solar panel foundations. But concrete has many problems:
- Slow Work:
Concrete takes days to set. You must wait for the concrete to cure. This slows down your work a lot. - High Costs:
It costs a lot of money in tools, labor, and materials. This makes your project expensive. - Bad for the Earth:
Concrete makes much CO₂. This is bad for the earth. Using heavy machines for digging also hurts nature. - Hard on Tough Ground:
Some soil is rocky, sandy, or uneven. Concrete does not work well on such ground. Your solar panels may not stay safe.
Imagine you have a project that needs to be done fast. You want less cost and less harm to the earth. Old methods do not match this need. This is the problem many of our customers face.
2. Agitate: How These Problems Affect You
When you use concrete foundations, you face many delays and extra costs. Think about these problems:
- Delays and Lost Time:
Waiting days for concrete to cure means your solar system stays off for much longer. This slows down your project.
For example, a solar project in a sunny state had to wait 2 to 3 days for the concrete to set, and this led to lost profits. - High Expense:
More labor and heavy equipment mean you must pay more. Money that can be saved is spent on extra work. - Damage to the Environment:
The earth must stay clean if we want a good future. Using concrete makes the air dirty and harms nature. - Not Good for Tough Sites:
If you live in an area with hard, uneven, or sandy soil, using concrete can make your project fail.
One customer in New York discovered that the concrete method was too slow and did not suit the rocky ground in his backyard.
These problems not only slow you down but also hurt your profit and the environment. It is easy to see that you need a better solution.
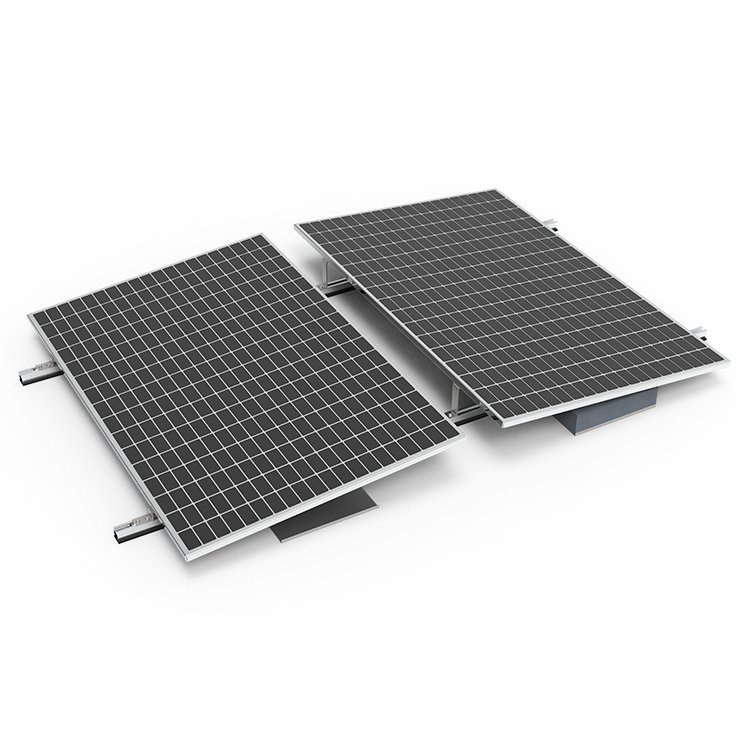
3. The Solution: Solar Ground Screws and Our Strong Manufacturing
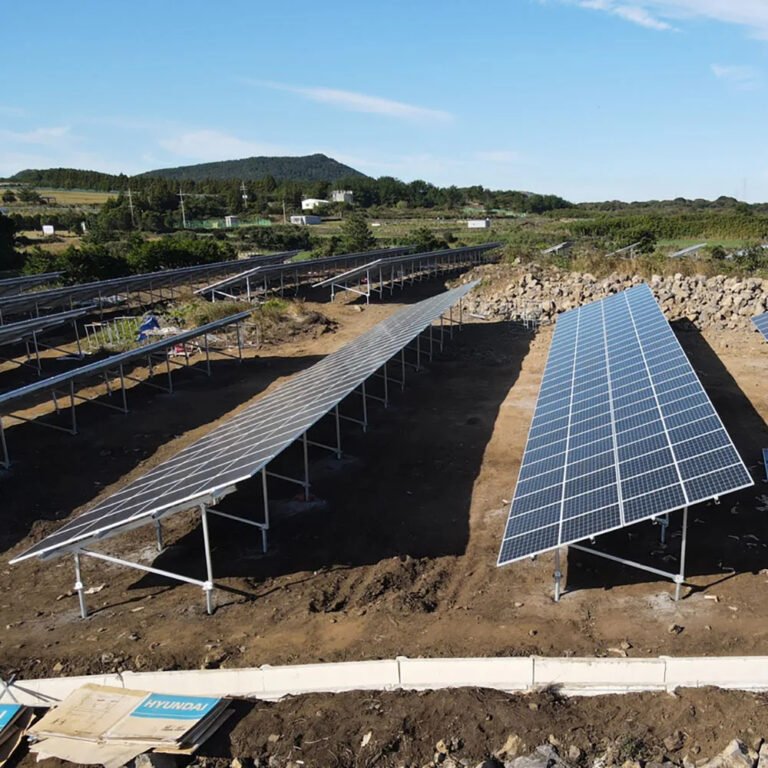
Solar ground screws are the smart answer to your problems. They are fast, cheap, eco-friendly, and work on all soils. They form a new kind of foundation that can be installed with simple tools. Our factory makes these screws with high quality and strong design.
Why Solar Ground Screws?
- Fast Installation:
You can install solar ground screws in 4–6 hours. There is no need to wait for concrete to harden.
See Table 1 for a clear comparison. - Lower Costs:
Because the work is fast and needs less labor, you save 30–50% on costs. - Eco-Friendly:
They require no concrete. This means much fewer CO₂ emissions and less harm to nature. - Works in Any Soil:
The helical design makes the screw bite into the ground. They work on rocky, sandy, or uneven soils. - Reusability:
You can remove and reuse these screws. This makes them ideal for projects that may change in the future.


Our strength as a solar mounting factory is that we make these accessories with care. We use strong, galvanized steel and advanced technology to make sure our products last a long time. We also provide many other solar mounting systems and accessories like our Sistema di montaggio solare a terra e C - Montaggio a terra in acciaio - Fondazione con pali a vite.
4. Tools and Materials You Need
Before you start, make sure you have all the right tools and materials. Here is a list:
- Tools:
- Hydraulic or Electric Driver: A tool that drives the ground screw into the ground.
- Soil Probe: To check soil type and see if the ground is soft or hard.
- Measuring Tape and Level: To mark and check the correct depth and alignment.
- Chalk or Marker: To mark spots on the ground.
- Materials:
- Solar Ground Screws: Choose the right size (see our product specs).
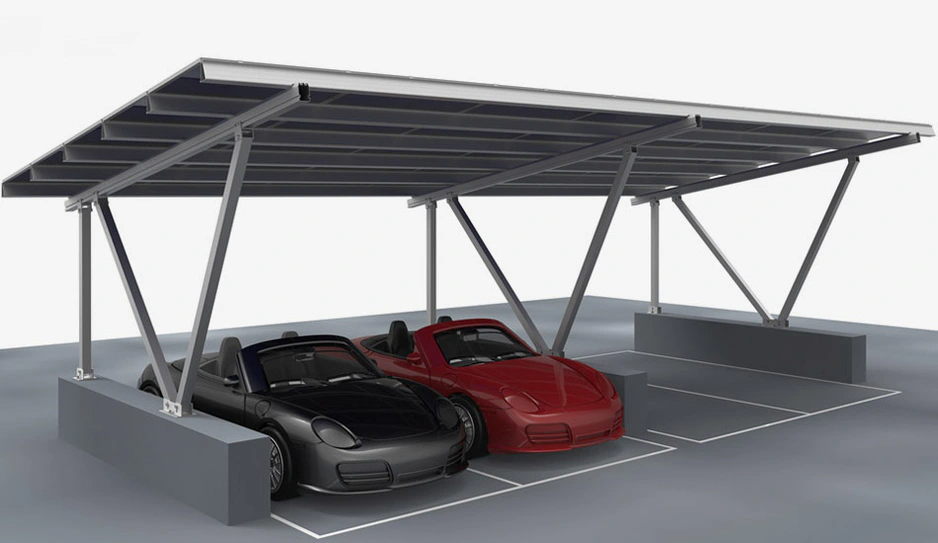
- Mounting Brackets and Rails: To attach your solar panels.
- Fasteners and Cables: To complete the frame.
- Additional Accessories: May include our solar mounting accessories for a strong assembly.
Visit our Solar Mounting Accessories page for more details.
Using the right tools and materials makes your work easier and your system strong.
5. Preparing the Installation Site
Before you install the screws, you must prepare your site.
Steps to Get Ready:
- Check the Soil:
- Look at the ground. Is it soft, sandy, or rocky?
- Use a soil probe to check stability.
- Mark the places where you will put the screws.
- Plan the Layout:
- Use a measuring tape to mark where each screw will go.
- Draw a grid so the screws are lined up correctly.
- Make sure there is enough space between screws for the solar panels.
- Ensure Good Drainage:
- Check that water can flow away from the site.
- Poor drainage can make the screws loose over time.
Following these simple steps makes sure your solar ground screws will work well and keep your panels safe.
6. Step-by-Step Installation Process
Below is a clear, step-by-step guide to installing solar ground screws. Follow each step carefully.
Step 1: Position the Screws
- Mark the Spots:
Use chalk and a measuring tape to mark where each screw will be placed.
Tip: Double-check the positions to match your solar panel layout. - Check the Distance:
Make sure the screws are evenly spaced. This helps the mounting system be strong.
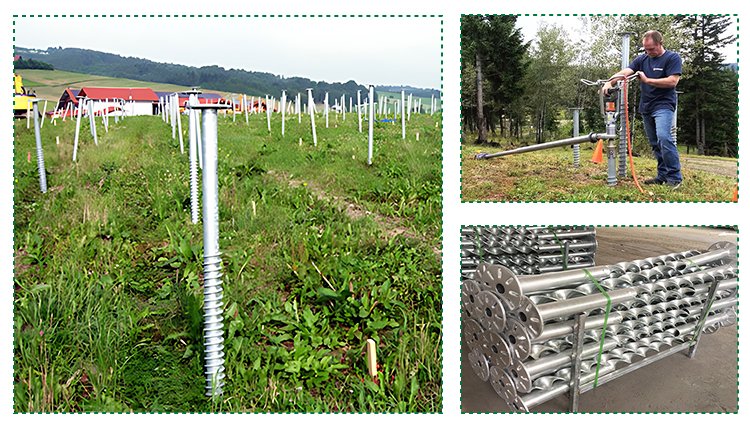
Step 2: Drive the Ground Screws
- Attach Your Tool:
Fix the ground screw to your hydraulic or electric driver. - Drive in the Screw:
Slowly drive the screw into the ground. Use a steady speed.
Remember: The helical shape helps the screw go in easily even in tough soil. - Watch the Depth:
Check the depth as you work. Use a level if needed.
For example, our installations usually go 1–2 feet deep, but this depends on your soil.
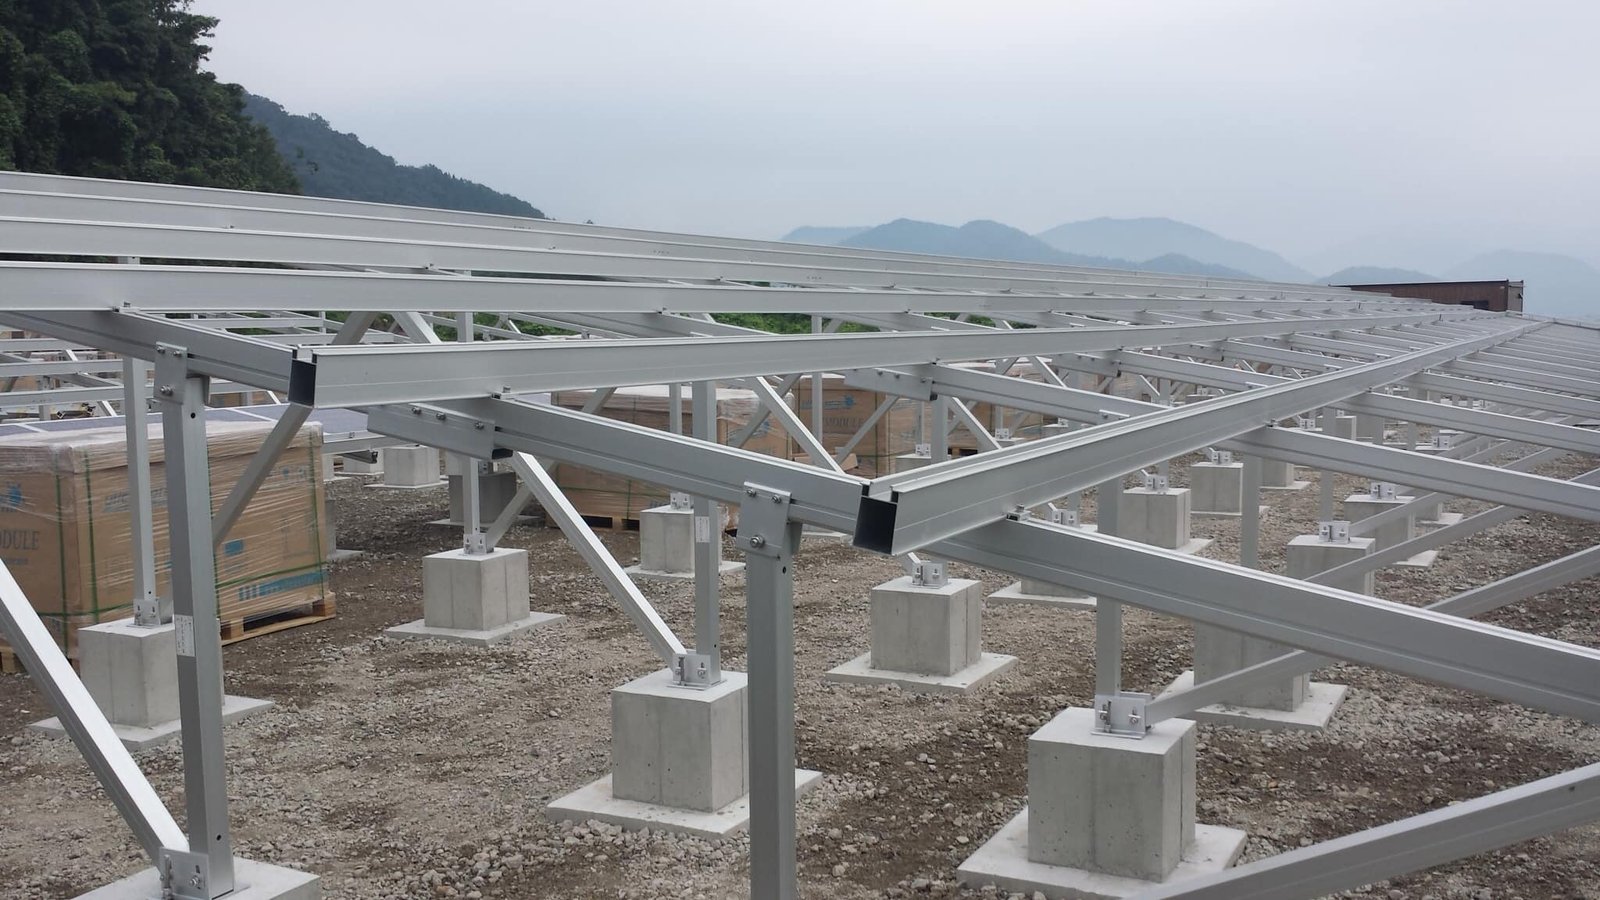
Step 3: Secure the Mounting Structure
- Attach Brackets:
Once the screws are in place, fix the mounting brackets to the screws. - Install Rails and Supports:
Secure the solar panel racking system on the brackets.
Ensure the whole structure is level and secure. - Final Tightening:
Use a level to double-check the alignment. Tighten fasteners if needed.
Step 4: Final Checks
- Inspect All Screws:
Make sure every screw is stable and properly seated in the ground. - Complete the Assembly:
Connect the brackets and rails. Wire your solar panels as per the installation guide. - Test the Setup:
Check the structure’s stability by applying a small force. Everything should hold firm.
Our step-by-step process makes installation simple—even if you are a beginner.
7. Comparing Solar Ground Screws and Concrete Foundations
Below is a helpful table showing how solar ground screws stack up against traditional concrete foundations. This data comes from our industry case studies and real-world statistics.
Table 1: Comparative Metrics
| Metric | Solar Ground Screws | Traditional Concrete Foundations |
|---|---|---|
| Installation Time | 4–6 hours (no curing required) | 2–3 days including excavation and curing |
| Labor Costs | 30–50% lower due to reduced time and fewer heavy tools | High – More labor and machinery needed |
| Impatto ambientale | Low – Minimal excavation; no concrete means lower CO₂ emissions | High – Concrete production and digging release CO₂ |
| Site Flexibility | Works on rocky, sandy, or uneven soils | Best on stable, compact soils |
This table shows that solar ground screws save you time, money, and the environment.
8. Real-World Case Studies
Real examples show the benefits of using solar ground screws. Here are some case studies from our customers:
Table 2: Case Studies in Solar Installation
| Project | Location | Time Saved | Cost Savings | Key Benefit |
|---|---|---|---|---|
| California Solar Farm | California, USA | 30% faster installation than concrete | ~40% lower overall cost | Worked well on rocky, uneven terrain |
| Residential Installation | New York, USA | Completed in a few hours vs. weeks | Significant savings | Quick setup with minimal ground disturbance |
| Commercial Rooftop Project | Texas, USA | Installed in half the time | Around 35% lower expense | Adaptable to varied urban roofing styles |
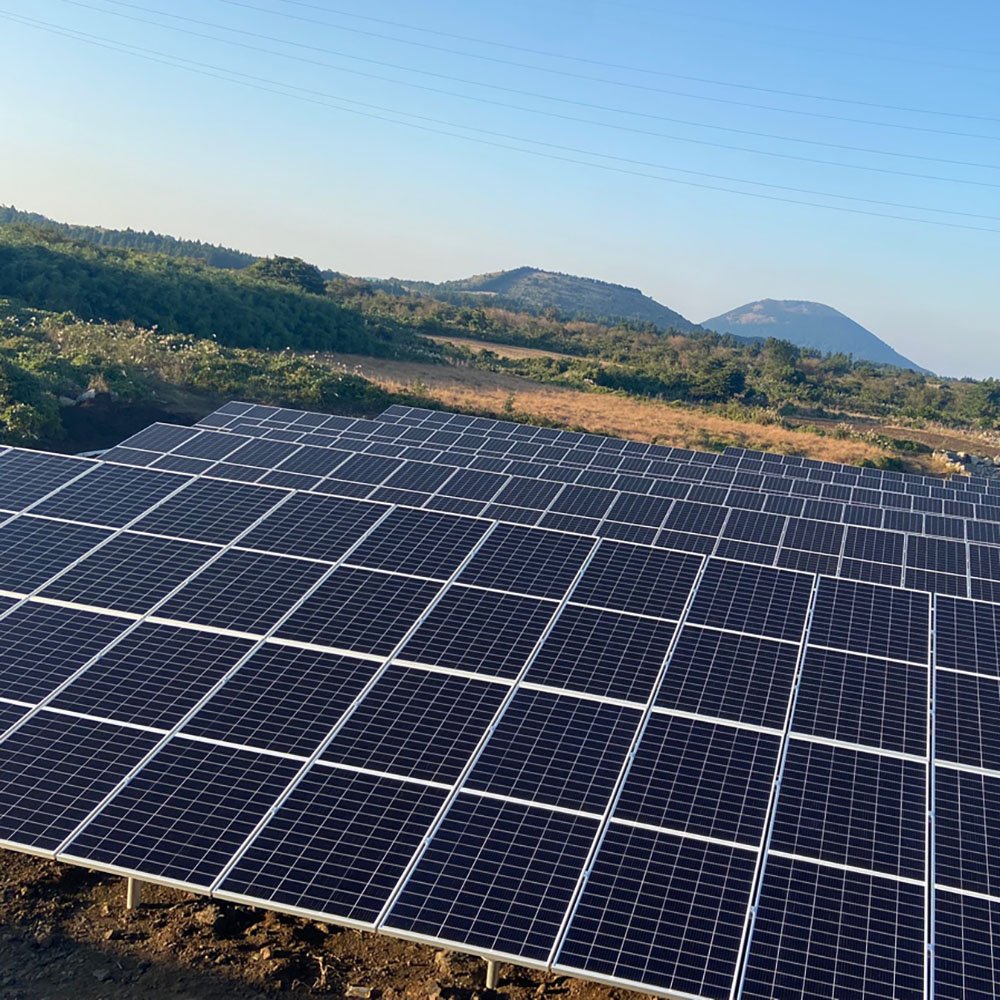
These case studies show that solar ground screws work well in many settings—from large solar farms to home installations.
9. Maintenance and Long-Term Benefits
A well-installed solar system needs regular checks. Solar ground screws are designed for long life and easy upkeep.
Maintenance Tips:
- Regular Inspections:
Check the screws, brackets, and mounting system every six months. - Tighten Fasteners:
If any parts loosen over time, tighten them to keep the structure firm. - Watch for Corrosion:
Our screws are made of acciaio zincato which resists rust. Still, check once in a while. - Replace as Needed:
If a screw becomes damaged, it is easy to remove and replace without disturbing the whole system.
Long-term, these benefits mean fewer repairs, less downtime, and a more reliable solar installation.
10. Our Manufacturing Strengths and Customer Benefits
At our solar mounting factory, we pride ourselves on quality and innovation. Here’s why you should choose our products:
- High-Quality Manufacturing:
We use strong, acciaio zincato and precise engineering to make every solar ground screw. This ensures high durability and reliability. - Cost-Effective Production:
Our advanced manufacturing methods lower costs for you. You get a quality product that saves both time and money. - Innovative Design:
Our solar ground screws are designed for easy installation. They work on tough soils and help make every solar project a success. - Wide Range of Products:
We offer not just solar ground screws, but also complete solar mounting systems and accessories. Explore options such as our Terreno agricolo Sistema di montaggio solare, Sistema di montaggio solare galleggiante, and more. - Customer Support:
Our expert team is here to help you at every step. If you face any issues during installation, our customer support is just a call or click away.
When you choose our solar mounting systems, you choose reliability, efficiency, and a greener future.

11. A Step-by-Step Recap Using the PAS Framework
Let’s quickly recap using the PAS method:
Problem:
- Traditional Foundations Are Slow and Costly:
Concrete takes days to set, costs more, and harms the environment. Many solar projects face delays and high expenses.
Agitate:
- These Issues Lead to Lost Time, Higher Costs, and Unwanted Environmental Impact:
Imagine losing days of work, spending extra money, and harming nature. Your project may not be as profitable or sustainable as it could be.
Solution:
- Solar Ground Screws Are the Future:
Install solar ground screws in just a few hours. Save up to 30–50% on labor costs, reduce CO₂ emissions, and work on all types of soil. Our high-quality, innovative products are made to last and are backed by our strong manufacturing experience.
By embracing solar ground screws, you turn a big problem into a smart solution. This leads to faster installations, lower costs, and better environmental results—all while boosting your project’s success.
12. Final Thoughts and Next Steps
If you want to transform your solar installation process, now is the time to switch to solar ground screws. They are a game-changer that can make your system strong, fast, and eco-friendly. Our step-by-step guide has shown you the entire process—from preparing the site to completing the final checks.
We are here to make your life easier. As a trusted solar mounting factory, we offer top-quality products and expert support. You deserve a solution that saves time, cuts costs, and protects the planet. Let our products help you achieve that.
For more details on our full range of solar mounting products, check out these links:
- Visit our Sistema di montaggio solare a terra page for more ways to boost your solar projects.
- Learn about our sturdy and versatile C - Montaggio a terra in acciaio - Fondazione con pali a vite.
- For those who need a lightweight option, explore our Aluminum Ground Mount – Screw Pile Foundation.
Take action today. Upgrade your solar installation with our innovative, cost-effective solar ground screws. You’ll enjoy a faster process, lower costs, and a greener system that stands the test of time.
By following this guide, you not only learn how to install solar ground screws but also gain insight into why they are the best solution in today’s market. We invite you to join the many satisfied customers who have transformed their solar projects with our products. Your journey to a swift, reliable, and eco-friendly solar installation starts here!
We are here to help. If you have any questions or need expert advice, feel free to contact our customer support team. With our top-grade solar mounting systems and accessories, your solar installation success is guaranteed.
This article uses clear language and real-world data to explain every step. It shows how our solar ground screws beat traditional concrete methods. By choosing our advanced products, you make a smart, sustainable, and cost-effective decision.
Enjoy your solar journey, and build a better future with our innovative mounting solutions!